Categories
Linux Self-hosting Technology

Offsite backup solution – Part 2

Chunk-sized tutorial is back! In the previous part, we booted into Armbian and watched it all via a USB-to-serial console. But that was just the beginning, since we need to set it up before it becomes useful.

Step 1: Initial Armbian setup

  1. root password: Generate some from your password manager and paste it twice.
  2. Live in the fast lane: Consider the warning that this is only an automated build for developers and think to yourself “Well, I already have this Neo3, why not make it do some work?”
    • PS: using something fully supported would be a more reasonable idea.
  3. Select your shell: either bash or zsh are fine.
  4. Create a standard user: Again make use of your password manager and create the user that will be doing the actual backups.

Step 2: Reboot to verify

After restarting, you might be greeted with a root filesystem journal error. In other words, the SD card went bad and corrupted the data. Looks like it is time to go back to the first part of the tutorial and try again with a different SD card!

See you there!

Categories
Linux Self-hosting Technology

Offsite backup solution – Part 1

Welcome back! In Offsite backup solution – Part 0 we discussed the importance of offsite backups and self-hosted solutions. We also went through the general steps of setting this all up. Now, let’s dive into getting Armbian running on a NEO 3 ARM computer since that is what I have at hand. We’ll cover everything from downloading the Armbian image to seeing the Neo3 booted up.

Step 1: Downloading the Armbian Image

Simple, right?

  1. Visit the Armbian Website: Head over to the Armbian download page.
  2. Search for the Neo3: The image should match your hardware.
  3. Download via Torrent: Opt for the torrent link. Your download client will handle the rest.

Why Torrent?
Downloading the large image via torrent is the way to go. Not only does it help share the bandwidth load, but it’s also a nod to the volunteer-supported nature of the project. Let’s give back to the community while we get what we need.

Step 2: Flashing the SD Card

Choosing Your Tool
For flashing your SD card on Linux, we have some great tools available. While Etcher is popular, let’s highlight Popsicle—a simple yet effective tool for this job.

  1. Install Popsicle:

Either from your distribution’s repository, or via Flatpak.

  1. Flash the Image:
  • Open Popsicle: Launch the tool.
  • Select Image: Choose the Armbian image file you downloaded.
  • Select Target: Pick your SD card as the target device.
  • Flash: Hit ‘Next’ and let it work its magic.

Step 3: Connecting via USB-to-Serial Adapter

Compatibility Matters
Not all USB-to-serial adapters are equal. The Neo3 requires a high baud speed: 1500000. Not all adapters support this and they won’t even give you an error when you try it. The CH340 chipsets are reliable and widely available, making them an excellent choice.

  1. Connecting the Adapter:
  • Plug In: Connect the USB-to-serial adapter to your Neo3 and your computer.
  • Check Compatibility: Ensure your adapter supports the required baud speed.
  1. Using GNU Screen to Connect:
  • Install Screen,
  • Start the Connection,
    bash screen /dev/ttyUSB0 1500000

At this point, you should see…nothing! Because the device is not running.

Step 4: Booting the Neo3

  1. Insert the SD Card: Place the flashed SD card into your Neo3.
  2. Power Up: Connect the power supply. Your Neo3 should start booting with Armbian Linux.

Now if you look at your serial console, you should see the Neo3 boot into Armbian Linux:

Welcome to Armbian_community 24.11.0-trunk.351 noble!

Congratulations! In the next part, we’ll build the software stack to perform an automated backup onto an external drive. Things will get interesting!

Categories
Guides Privacy Self-hosting Technology

Offsite backup solution – Part 0

Our digital belongings are growing in size and importance. Family photos, accounting documents, beloved video games, losing them would be a nightmare. Having a backup is definitely mandatory. And if you’re self-hosting a lot like me, an offsite backup is a good way to be able to sleep calmly at night. I recently needed to rebuild my offsite storage system and so I decided to share my setup and my experience using it. This might be a long series, so hold on!

What Are Offsite Backups?

Offsite backups mean storing copies of your data in a different physical location from your main data. That means outside of your house! This way, if something unexpected happens (like a fire, theft, or hardware failure), your data is not completely lost. You could use cloud services for this, but we’ll focus on self-hosted solutions. I like to be in control, plus it gives me good understanding of how it all works.

Benefits of Offsite Backups

  1. Data Security: Keeping your data in a separate place protects it from local disasters.
  2. Redundancy: Extra copies of your data mean you’re covered if something goes wrong.
  3. Peace of Mind: Knowing your data is safe offsite gives you one less thing to worry about.

Additionally, if your backup is offline (in cold storage), it will be cheaper to run. No electricity or compute needed. And no need for fancy firewalls or access management, no one has access to the data unless they physically get to the hard drive.

My Self-Hosted Offsite Backup Setup

I run a local NAS with mirrored hard drives, shared over SMB on the LAN. This is the primary storage.

Next, there is a tiny ARM computer with an external hard drive that receives a weekly snapshot from the NAS, stored and encrypted via BorgBackup.

Lastly, a lonely external hard drive lives in my relative’s flat. And every time I make a visit there, I bring the other hard drive and swap them out.

Self-Hosted Backup Solution Overview

Step 1: Set Up Your Backup Server

  1. Choose Your Hardware: An old computer, a NAS, a Raspberry Pi. Make sure you have enough storage space on two separate drives.
  2. Install Linux: A lightweight Linux distro like Ubuntu Server or Debian works great.
  3. Secure Your Server: Set up SSH for remote access, configure a firewall, and keep your system updated.

Step 2: Configure the Backup Software

  1. Install the backup software: BorgBackup in this case.
  2. Configure mount points: both to the source and the destination of the backup.

Step 3: Automate and Monitor Your Backups

  1. Set up the automation: Fetch the data diff, compress and encrypt it, store it.
  2. Monitoring: Make sure you periodically find out that things DO work.
  3. Swap the drives: This is the actual offsite step!

Step 4: Test Your Backups

  1. Regular Testing: Periodically try and restore some data to make sure your backups and tools work.
  2. Health Checks: Inspect the state of the drives to replace them before they go ERR!

Is that it?

I didn’t even start yet! This was just a brief introduction of what I’m about to discuss in this series. More details to come in the next part where I’ll look into setting up the hardware.

Categories
Games Open source Programming Projects

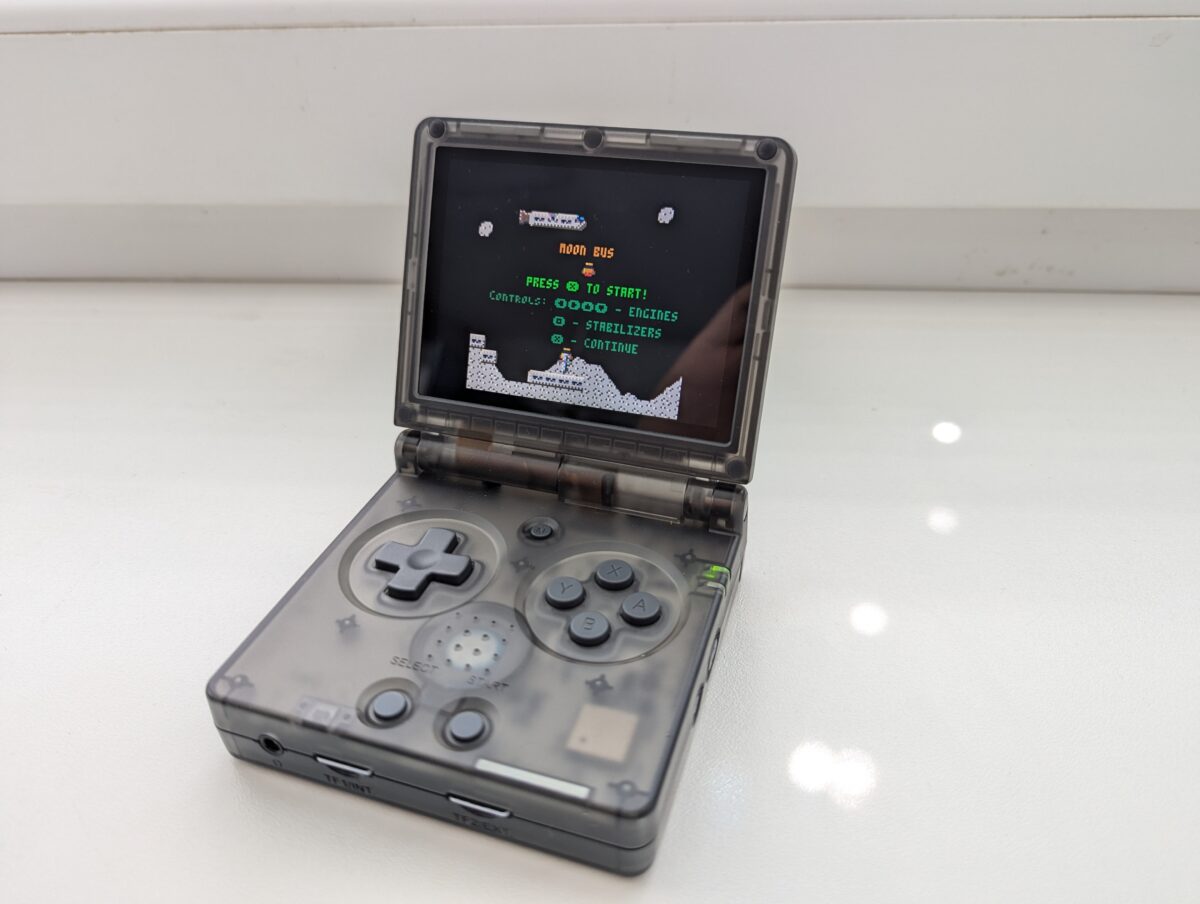
Moon Bus :: PICO-8 game

I couldn’t resist the temptation to get down to coding a game like it was the 1980s again: small screen, huge pixels, 8-bit values, limited resources, limited instruction set, lots of fun.

PICO-8 is a fantasy console that only ever existed as an emulator. But oh boy, what a fun and well executed concept. I bought the license (sic, this is not a free nor open source software) so that I could play it on my Anbernic RG35XX H emulator console. And it is an amazing experience, being able to play 8-bit retro games that are freshly released and wirelessly downloaded onto a handheld device.

Since PICO-8 provides an all-in-one environment for games development, I decided to give it a try. Enter Moon Bus. This is a simple ‘Lunar Lander’-like game, where you have to travel from station to station, landing several times in a row to carry passengers around a low-gravity planet. I had a lot of fun building this and subsequently playing this on my handheld.

You can find the game on the official PICO-8 site: Moon Bus at www.lexaloffle.com

I love that there are still options to get into simple programming, without any need for massive frameworks and libraries. It is a refreshing experience and it really reminds me of coding way back when you didn’t have that many options or expectations. You definitely don’t need a cluster of GPUs to compile shaders like with other current platforms.

Categories
Brainwaves Linux

PinePhone Daily Cron Fixed

I needed to run a daily cron job on my PinePhone, but that turned out to be trickier than expected. How can you schedule a job to be run in the morning, when the phone is most likely asleep (suspended) at that time?

My solution (workaround?) was to have the cron job run every 10 minutes, checking if the job was already executed today and if not, run the actual job command. This check is pretty cheap and I don’t need to wake the phone up to run my job. All I need is to get the job executed “today, whenever you have the time”.

The Cron Limiter tool (crolim for short) is available in my snippets repository.

With this tool, the crontab is as easy as: */10 * * * * crolim podget. Now my daily podcasts can be downloaded daily, when the phone is awake.

Categories
Brainwaves Linux Open source

PinePhone Printing on a Thermal Receipt Printer

I like using PinePhone as a general purpose computer for various tasks and purposes, such as a dedicated alarm clock, trying out networking software (I have several of them), etc. This time I tried attaching a POS Printer, creating a print server.

Linux is great when it comes to printers support, thanks to CUPS. It usually just works. For the POS Printer I needed to install additional drivers, but luckily there are some generic ones available, covering most of the 58mm / 80mm thermal printers (they share the same ESC/POS protocol, making them widely compatible).

Initially I wanted to use the official vendor-supplied printer drivers for Linux ARM, but there are several ARM architectures and this wasn’t the right one. Therefore I used these CUPS drivers instead: github.com/klirichek/zj-58. And since this is open source, I was able to compile them for the PinePhone’s ARM architecture and get it working.

Adding a printer can be done through the CUPS web interface running on localhost:631, where you can add the printer connected over USB. You can also connect a printer over serial or Bluetooth, all you need is a special connection URL: serial:/dev/ttyXXX or bluetooth://123456789a/ where you specify the serial file or the device address.

Once the printer is added, you can use all the lp* commands to manage your print jobs, such as lpoptions to configure the printer defaults, or lp tux.png to print out an image on a thermal printer!

Categories
Brainwaves Raspberry Pi

Kodi on Raspberry Pi 3 running Arch Linux ARM

When setting up Kodi under Arch Linux ARM running on Raspberry Pi 3, I encountered this error, which crashed the graphical environment right from the start:

[drm:vc4_bo_create [vc4]] ERROR Failed to allocate from CMA:
...

After some searching, I ran into an issue thread, where it was advised to increase the CMA memory (as a workaround that seems to just be the actual fix). You need to add ‘cma=256M’ to the kernel boot parameters. But how do you do that?

# Run as root...

# dependencies
pacman -S uboot-tools

# modify the kernel boot parameters
cd /boot
vim boot.txt # append cma=256M to the line with boot params
./mkscr
reboot

Before this fix, I had only 64 MB of CMA. This wasn’t enough. To check that this worked:

if the cma parameter is present and /proc/meminfo

cat /proc/cmdline
# should contain cma=256M

cat /proc/meminfo | grep Cma
# should say CmaTotal: 262144 kB

Now Kodi finally starts!

…though there are still some problems with the graphics driver (video doesn’t play, random switching to the console and back).

As it turns out, using the AArch64 version of Arch Linux ARM for Kodi is not the best option. Switching to the ARMv7 version helped a lot, everything worked from the start.

Categories
Awesome Hardware Linux

Orange Pi Zero running in QEMU

I needed a way to run an Orange Pi Zero SD-Card image of Armbian as a virtual machine. And this is actually possible with QEMU!

This is the command I used:

qemu-system-arm \
-M orangepi-pc -m 1024 -cpu cortex-a7 -dtb boot/dtb/sun8i-h3-orangepi-pc.dtb \
-kernel boot/vmlinuz-5.4.45-sunxi -initrd boot/initrd.img-5.4.45-sunxi \
-append 'earlyprintk loglevel=8 earlycon=uart8250,mmio32,0x1c28000,115200n8 console=ttyS0 root=/dev/mmcblk0p1' \
-nographic -serial stdio -monitor none \
-drive file=Armbian_20.05.3_Orangepizero_buster_current_5.4.45.img,format=raw,if=none,id=d1 \
-device sd-card,drive=d1 \
-nic user,model=allwinner-sun8i-emac,hostfwd=tcp::50022-:22

Original source: https://forum.armbian.com/topic/7547-run-armbian-into-qemu/?tab=comments#comment-86797

You need to get the contents of the /boot directory from the SD Card image so that you can start booting it. I just used scp to copy it from a running Orange Pi Zero to my main machine. The command above doesn’t actually run an Orange Pi Zero board, it runs an Orange Pi PC, though this is almost the same thing. At least the CPU is the same (note: Allwinner H2+ and H3 are binary compatible). But it has more memory!

Why run Armbian in QEMU?

I wanted to compile an application written in Rust. The problem was that installing it the official way through rustup (or more precisely rustup-init) resulted in an error:

info: installing component 'cargo'
info: Defaulting to 139.4 MiB unpack ram
thread 'main' panicked at 'RUSTUP_UNPACK_RAM must be larger than 220000000', src/dist/component/package.rs:200:13
note: run with `RUST_BACKTRACE=1` environment variable to display a backtrace
thread 'main' panicked at 'No process instance', src/currentprocess.rs:126:17

The newer versions of rust required more memory than the Orange Pi Zero had! Mine had 256 MB (since I thought I’d take this as a challenge instead of going with the 512 MB version). Rustup needed at least 220 MB on its own.

Alternatively I could get some cross-compilation toolchain. But that seemed even harder; I couldn’t find anything usable.

Categories
Hardware

Serial Connection to Orange Pi 4

I thought I’d use my trusty CP2102 USB-UART adapter. But as it turns out, it only works up to 1 Mbps, while the Orange Pi 4 is running at 1500000 bauds. Oops.

My other attempt was to try the Raspberry Pi‘s serial port, but that also didn’t work. The data coming in was also just a random garbage.

I tried using a random Arduino‘s on board serial module CH340 (while having Reset hooked up to GND so that it bypasses the Atmel chip) but that for some reason didn’t produce any data on the high baud rate. Even though based on the specification of the chip the baud rate should be supported.

My next attempt was with an ESP32 dev board, hooking it up similarly to an Arduino. No luck, turns out there is again the CP2102 chip. There was some output from the Orange Pi 4, but again it was garbage since it can’t keep up at this speed.

Finally I found a lonely DAPlink module that is specifically designed for ARM programming. Among other things it has a UART with 3.3V TTL levels. And bingo, this one was fast enough to finally read the Orange Pi 4’s debug UART port.

Categories
Awesome Linux Open source PinePhone Projects

Mouse in a Pipe

Have you ever wanted to control your notebook directly from your desktop? How about controlling your phone? Wouldn’t it be better to type that chat message using a real keyboard? I wanted the same thing, so I wrote an app for that!

More precisely I created a tool that enables you to redirect mouse and keyboard events from one device to another. It’s like you reconnected your mouse and keyboard, but without the physical effort! All of this happens on a very low level (through the kernel) so this works seamlessly with any application you want to control. All you need is a Linux OS on both of the devices.

Repository: https://github.com/Dejvino/mouse-piped

One more interesting point is that the input events are pushed through a pipe, which is a generic way of transferring data among processes in Unix-based operating systems. It is up to you how you decide to transfer the data. Though most likely it will happen via SSH. You can easily generate input events on your main computer and then pipe them through SSH to your secondary computer (or a phone) and control it that way. Or you might decide to create a TCP connection and pass the data through that. That’s up to you!

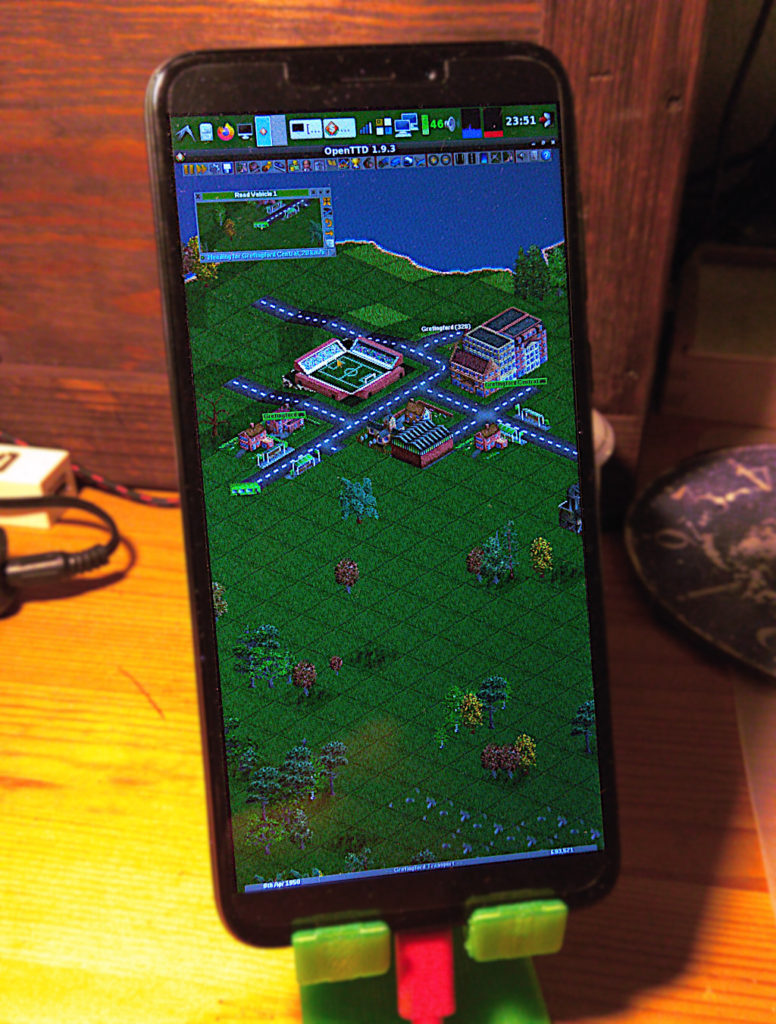
And you know what else is this useful for? That’s right, you can finally play OpenTTD on a PinePhone with the full comfort of a mouse and keyboard!