Categories
Awesome Hardware Projects

AI reverse-engineered my groovebox

My Sonicware LoFi-12 XT is a wonderful sampling groovebox with one annoying property: the firmware is a black box. Updates ship as a mystery .bin on an SD card, and nobody outside Sonicware knows what’s inside it.

Since I’m a curious person, I let an AI agent dig into it: unpack the binary, disassemble the code, analyze the bootloader. We managed to crack the checksum function, unlocking custom firmware images.

And it comes as no surprise that the AI did most of the reverse engineering, while I provided the hands driving the screwdriver.

The setup

The Lofi-12 XT runs on a Texas Instruments TMS320C6748 (an ARM9 plus a C674x DSP) with DDR2 RAM and two SPI flash chips hiding under stickers on the core module. My job, the human job: open the unit, photograph everything, peel the stickers (both chips are Macronix MX25L12833F, 16 MB each), and dump them with a ten-dollar CH341a USB programmer.

That part was genuinely fiddly. The infamous black CH341a board drives its signal lines at 5 V even in the “3.3 V” jumper position — enough to damage 3.3 V flash — so there was multimeter work and a small voltage mod before a single byte got read. Every chip got dumped twice and compared, just to be sure.

What the AI did with the dumps

Given the raw flash contents, the agent:

  • Mapped the boot chain. The first flash chip starts with a TI AIS boot image: PLL/DDR init, ten code sections loaded into RAM, then a jump to the DSP entry point. The updater itself lives in there, which means a bad SD image can’t brick recovery — the single most important safety finding.
  • Parsed the update format. The SD .bin is a small container (cmtd/mmtd/sect) holding a DDR memory snapshot for the DSP, fully mapped section by section.
  • Found the checksum checker in DSP disassembly — a bitwise CRC-32 routine called in 4 KiB chunks from the update loop — and then did the part I’m happy I didn’t have to do manually: instead of guessing the algorithm, it set up the CRC math as 32 linear equations over GF(2) and solved for the unknown constant using my three stock firmware versions as equations. All three independently produced the same value: 0xC27C6282 — which also appears literally in the bootloader code. Checksum: CRC32 of the image with bytes 8–11 replaced by that seed. Reproduces all three stock checksums exactly.

The repo

Everything is now a clean, shareable research repo (lofi-12xt-firmware on Gitea): hardware docs with board photos, bootloader and update-flow writeups, a per-version firmware deep dive, the full reverse-engineering playbook (including every CH341a pitfall), and a stdlib-only Python toolkit that parses, repacks, patches, and verifies images. No vendor binaries are shipped — you bring your own stock .bin, and the tools forge valid modded images from it. The Hello-World mod is already built: Threshold renamed to ThresholX, checksum self-consistent, waiting for its
first boot test.

What’s next

I could explore this more, promise to build a whole new firmware etc. But I won’t do that.

Honestly, this is quite an achievement for an afternoon with an unknown electronics device, an AI agent and the right tools. And I did this just for fun. To learn. I did it as a dare to see if I could spoof my own firmware using AI.

But building a fully custom (or at least sufficiently different) firmware this way is just not practical. Not without support from the manufacturer. Even with these amazing new capabilities. There are better ways to spend one’s time.
Categories
Awesome Hardware Linux

Orange Pi Zero running in QEMU

I needed a way to run an Orange Pi Zero SD-Card image of Armbian as a virtual machine. And this is actually possible with QEMU!

This is the command I used:

qemu-system-arm \
-M orangepi-pc -m 1024 -cpu cortex-a7 -dtb boot/dtb/sun8i-h3-orangepi-pc.dtb \
-kernel boot/vmlinuz-5.4.45-sunxi -initrd boot/initrd.img-5.4.45-sunxi \
-append 'earlyprintk loglevel=8 earlycon=uart8250,mmio32,0x1c28000,115200n8 console=ttyS0 root=/dev/mmcblk0p1' \
-nographic -serial stdio -monitor none \
-drive file=Armbian_20.05.3_Orangepizero_buster_current_5.4.45.img,format=raw,if=none,id=d1 \
-device sd-card,drive=d1 \
-nic user,model=allwinner-sun8i-emac,hostfwd=tcp::50022-:22

Original source: https://forum.armbian.com/topic/7547-run-armbian-into-qemu/?tab=comments#comment-86797

You need to get the contents of the /boot directory from the SD Card image so that you can start booting it. I just used scp to copy it from a running Orange Pi Zero to my main machine. The command above doesn’t actually run an Orange Pi Zero board, it runs an Orange Pi PC, though this is almost the same thing. At least the CPU is the same (note: Allwinner H2+ and H3 are binary compatible). But it has more memory!

Why run Armbian in QEMU?

I wanted to compile an application written in Rust. The problem was that installing it the official way through rustup (or more precisely rustup-init) resulted in an error:

info: installing component 'cargo'
info: Defaulting to 139.4 MiB unpack ram
thread 'main' panicked at 'RUSTUP_UNPACK_RAM must be larger than 220000000', src/dist/component/package.rs:200:13
note: run with `RUST_BACKTRACE=1` environment variable to display a backtrace
thread 'main' panicked at 'No process instance', src/currentprocess.rs:126:17

The newer versions of rust required more memory than the Orange Pi Zero had! Mine had 256 MB (since I thought I’d take this as a challenge instead of going with the 512 MB version). Rustup needed at least 220 MB on its own.

Alternatively I could get some cross-compilation toolchain. But that seemed even harder; I couldn’t find anything usable.

Categories
Awesome Linux Open source PinePhone Projects

Mouse in a Pipe

Have you ever wanted to control your notebook directly from your desktop? How about controlling your phone? Wouldn’t it be better to type that chat message using a real keyboard? I wanted the same thing, so I wrote an app for that!

More precisely I created a tool that enables you to redirect mouse and keyboard events from one device to another. It’s like you reconnected your mouse and keyboard, but without the physical effort! All of this happens on a very low level (through the kernel) so this works seamlessly with any application you want to control. All you need is a Linux OS on both of the devices.

Repository: https://github.com/Dejvino/mouse-piped

One more interesting point is that the input events are pushed through a pipe, which is a generic way of transferring data among processes in Unix-based operating systems. It is up to you how you decide to transfer the data. Though most likely it will happen via SSH. You can easily generate input events on your main computer and then pipe them through SSH to your secondary computer (or a phone) and control it that way. Or you might decide to create a TCP connection and pass the data through that. That’s up to you!

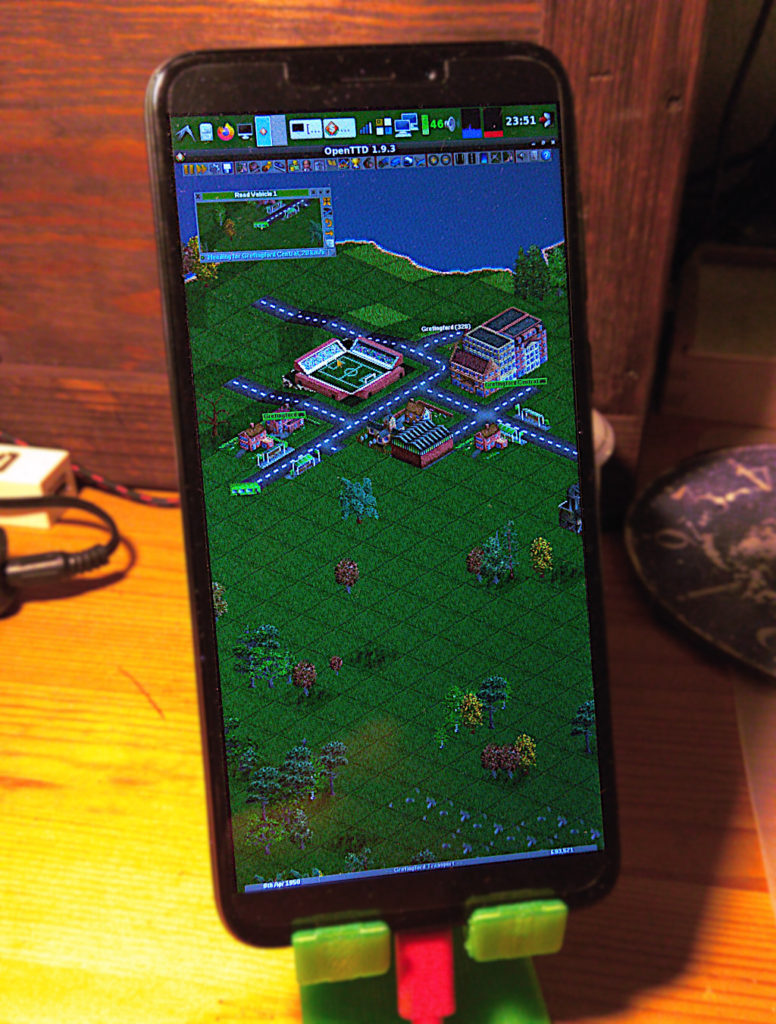
And you know what else is this useful for? That’s right, you can finally play OpenTTD on a PinePhone with the full comfort of a mouse and keyboard!

Categories
Awesome Open source Programming Projects Technology

How to use an ESP8266 — a jumpstart tutorial

If you haven’t done so already, go buy yourself an ESP8266-based board. It is a powerful little microcontroller. Something like Arduino but with WiFi.

ESP8266 in the wild

What hardware to get

What software to get

  • ESP open SDK
    • Contains all the tools needed for compiling your own ESP firmware.
  • NodeMCU firmware
    • This converts the ESP to a LUA-powered computer.
  • ESPlorer
    • Very helpful serial terminal with direct ESP8266 and NodeMCU support

What to do with it all

  1. Find the pinout of your board. Get the connections ready (USB-UART + 3.3V power source + ESP8266)
    • 3.3V to VCC, GND to GND
    • RX to TX and TX to RX (ESP–UART).
    • CH_PD to VCC
    • Leave Reset floating, connect to GND to reset the chip when needed.
    • Pull the GPIO0 low for flashing.
  2. If you just want to get the ESP fired up, use the esptool.py and upload the precompiled NodeMCU bin images.
  3. If you want to play around some more, get the SDK and NodeMCU source code. Compile the former and then the latter. Flash our own bin images.
  4. Remove GPIO0 connection to leave the flashing mode.
  5. Open the ESPlorer and issue some commands to the chip!

Useful links

  • Dejvino’s NodeMCU firmware
    • Forked from the original NodeMCU firmware repository. Contains a new Sniffer module — packet sniffing functions exposed to the LUA interpreter. This allows WiFi packet sniffing using the ESP8266.
  • NodeMCU API
    • List of provided LUA functions in the NodeMCU firmware.
  • LUA language reference
    • Beware that not everything is supported in the ESP version of LUA.
Categories
Awesome Privacy Technology

Firefox Extensions

Here is a short list of Firefox extensions that I think are essential for your everyday browsing. I don’t want to persuade you into using them, this is more like a note to self for future reference.

Other nice to have extensions are these:

And it goes without saying that if there is one thing you don’t need, it is Adobe *, e.g. Flash. Just don’t download it. No one needs it. No one.

Categories
Awesome PicoPosts Projects

Playful Little Corpses Released

My very own horror game “Playful Little Corpses” is now released.

Playful Little Corpses

To find out more about it, head to the project entry page or to the main page of the game. Download it and give it a try!

Project entry page: projects.dejvino.com/w/playful-little-corpses/

Main page: hrave.mrtvolky.cz

Categories
Awesome PicoPosts Projects

Projects page is open

I’ve opened a new page dedicated to the projects I worked on. You can find links to source code of various games and utilities. Every project entry is described in short and you know whether it was just an idea I didn’t have time to finish, or a fully working product.  The list goes years back.

Link to the actual website:

projects.dejvino.com

Categories
Awesome Linux Open source Programming Projects Technology Web development

HTTP and HTTPS running on the same port

Running HTTP and HTTPS on the same port with Apache. They said it couldn’t be done. They were wrong!

https://github.com/Dejvino/https-multiplexer

I’ve modified a simple Python port forwarding utility to act as a port multiplexer that can automatically forward HTTP and HTTPS requests to the appropriate ports. If the request looks like an HTTP in plain text, it forwards it to port A. Otherwise it is assumed to be HTTPS and is forwarded to port B.

Now you can run your web applications from a single port, regardless of using HTTP or HTTPS. Hooray!

Categories
Awesome PicoPosts Projects

New Homepage

After uniting both of my personal domains (dejvino.cz and dejvino.com) to have the same content, I’ve prepared a new personal hompage.

Links:

www.dejvino.cz
www.dejvino.com

The purpose of this page is to act as a simple roadsign with directions to all of my projects and pages.
There is also a little “easter egg” floating around that page. Try to find it!

Categories
Awesome Music Technology

Floppy drive music

I knew this could be done! … Game of Thrones’ main theme played by 6 floppy drives. Enjoy.

http://www.youtube.com/watch?v=IYQWLlBz8hE&feature=youtu.be&t=7m27s